Complete Guide: 8 Steps to a Seamless Home HVAC Install
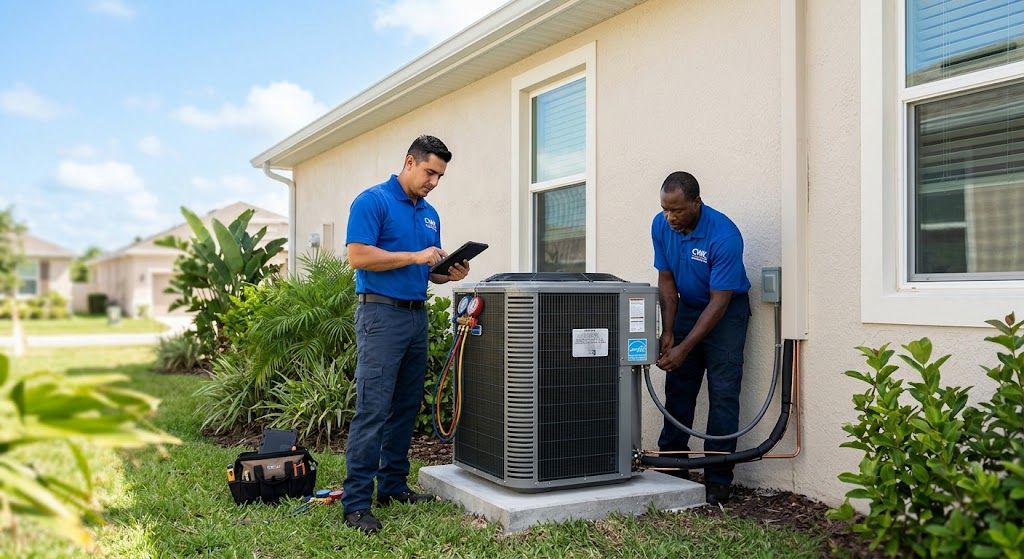
Upgrading or replacing your heating, ventilation, and air conditioning equipment is one of the most significant investments you can make in your home. A proper HVAC install impacts your daily indoor comfort, health, monthly utility expenses, and overall property value. Whether your current heating and cooling unit is struggling to combat summer heat waves, making unusual noises, or steadily driving up your electric bill, understanding how the replacement process works equips you to make smart decisions every step of the way.
This step-by-step guide covers everything you need to know about preparing for, executing, and maintaining a successful HVAC install.
Step 1: Recognize when It Is Time to Replace Your System
Knowing when to replace rather than repair your climate control setup prevents unexpected breakdowns during extreme weather. While minor component failures can be repaired, aging equipment eventually reaches a point of diminishing returns.
System Age and Lifespan
Most residential split systems and heat pumps have an average operational lifespan of 10 to 15 years. If your equipment was installed over a decade ago, newer models offer vastly superior energy efficiency ratings, advanced humidity control, and lower operating costs.
Frequent Repairs and High Utility Bills
If you are repeatedly paying for service calls, replacement capacitors, or refrigerant recharges, those costs compound quickly. Furthermore, internal wear causes older compressors and blower motors to consume significantly more electricity to achieve the same cooling or heating output.
Inconsistent Temperatures and Humidity Issues
An outdated or failing unit struggles to maintain consistent temperatures across different rooms. In high-humidity environments, an aging system loses its ability to pull moisture from the air, leaving your home feeling sticky even when the thermostat reports a lower temperature.
Step 2: Select the Right System Type for Your Property
Modern heating and air technology offers several configurations. Selecting the right format depends on your home’s architecture, existing infrastructure, and regional weather patterns.
- Central Split Systems: The most standard residential setup, featuring an outdoor condenser unit paired with an indoor air handler or furnace.
- Heat Pumps: High-efficiency units capable of providing both heating and cooling by reversing refrigerant flow. These are ideal for regions with long cooling seasons and mild-to-moderate winters.
- Ductless Mini-Splits: Ideal for room additions, converted garages, or historic homes without existing ductwork, offering zoned temperature control.
- Packaged Units: Combine all heating and cooling components into a single outdoor cabinet, typically installed on a roof or concrete pad adjacent to the foundation.
Step 3: Perform Accurate System Sizing via Load Calculations
A critical mistake in any HVAC install project is choosing a unit based solely on total square footage or simply matching the tonnage of the old system.
Professional technicians use standardized Manual J Load Calculations to calculate precise cooling and heating loads. This calculation accounts for multiple structural variables:
- Total square footage and ceiling height.
- Window orientation, quantity, and energy efficiency ratings.
- Insulation levels in attic spaces, crawlspaces, and exterior walls.
- House orientation relative to direct sunlight exposure.
- Local outdoor climate conditions and design temperatures.
Installing an oversized system leads to "short-cycling," where the unit turns on and off rapidly without running long enough to dehumidify the air. Conversely, an undersized unit runs continuously, straining internal components and failing to reach set temperatures during extreme weather.
Step 4: Evaluate Energy Efficiency Ratings and Technology
Understanding efficiency metrics helps you evaluate upfront equipment costs against long-term operational savings.
SEER2 (Seasonal Energy Efficiency Ratio 2)
├── Measures seasonal cooling efficiency
└── Higher numbers = lower monthly cooling power consumption
EER2 (Energy Efficiency Ratio 2)
├── Measures cooling efficiency at peak high temperatures (e.g., 95°F)
└── Indicates performance under extreme heat loads
HSPF2 (Heating Seasonal Performance Factor 2)
├── Measures heat pump heating performance over a standard season
└── Higher values indicate lower electric heating costs
Single-Stage vs. Variable-Speed Compressors
- Single-Stage: Runs at 100% capacity whenever operating. Lower upfront cost, but higher energy consumption and sharper indoor temperature swings.
- Two-Stage: Operates at a low setting (roughly 65-70% capacity) for milder days and ramps up to high capacity during extreme heat or cold.
- Variable-Speed (Inverter-Driven): Dynamically adjusts output in small increments between 25% and 100%. This technology provides the highest energy savings, ultra-quiet operation, and optimal humidity control.
Step 5: Inspect and Upgrade Supporting Infrastructure
A high-performance heat pump or air conditioner cannot deliver optimum performance if the supporting infrastructure is compromised. A professional installation addresses the entire airflow and electrical network.
┌─────────────────────────────────────────────────────────┐
│ COMPREHENSIVE HVAC INSTALL │
├──────────────────────────┬──────────────────────────────┤
│ Equipment Replacement │ Infrastructure Upgrades │
├──────────────────────────┼──────────────────────────────┤
│ • Outdoor Condenser │ • Ductwork Sealing & Sizing │
│ • Indoor Air Handler │ • Thermostat Line Voltage │
│ • Evaporator Coil │ • Condensate Drain Lines │
│ • Expansion Valves │ • Refrigerant Line Sets │
└──────────────────────────┴──────────────────────────────┘
Ductwork Verification and Modifications
Leaky, undersized, or damaged ductwork can waste up to 30% of conditioned air. Prior to placing new equipment, technicians inspect duct runs for proper static pressure, air leaks, and adequate insulation to prevent condensation buildup.
Thermostat and Control Setup
Modern systems utilize smart or communicating thermostats to manage multi-stage or variable-speed operation. Upgrading your control interface ensures proper communication between indoor sensors and outdoor units while enabling remote scheduling and moisture management.
Step 6: What to Expect on Installation Day
Knowing what occurs on installation day helps you prepare your space and ensures a smooth workspace for the installation team.
- Site Preparation and Protection: Technicians lay down floor coverings, protect entryways, and clear access paths to both indoor mechanical closets and outdoor equipment pads.
- Refrigerant Recovery and System Removal: Existing refrigerant is safely recovered into EPA-approved containment cylinders according to environmental standards. Old equipment, coils, and electrical disconnects are then disconnected and removed.
- Pad and Platform Upgrades: The outdoor area is leveled, and a new composite equipment pad is placed. Indoor air handlers are secured on vibration-dampening pads or isolation mounts.
- Line Set and Electrical Connections: New copper line sets (or thoroughly flushed existing lines) are connected. Electrical whips, disconnect boxes, and breaker switches are verified or replaced to match equipment voltage requirements.
- Duct Transitions and Condensate Lines: Custom duct transitions are fitted to minimize air turbulence. New safety float switches and PVC condensate drain lines are installed to prevent water damage from blocked drains.
Step 7: System Evacuation, Commissioning, and Testing
Once physical placement and wiring are complete, technicians conduct thorough commissioning tests before handing the system over to the homeowner.
Nitrogen Purging and Deep Vacuum Evacuation
Technicians pressurize the copper line set with dry nitrogen to check for leaks at brazed joints. Next, a high-vacuum pump pulls the system down below 500 microns to remove all non-condensable gases and moisture. This critical process prevents internal corrosion and ensures long-term compressor reliability.
Refrigerant Charge and Airflow Balancing
The precise amount of refrigerant is weighed into the system, and superheat or subcooling measurements are taken to verify optimal thermal expansion. Static pressure across the air handler is measured to verify that airflow matches manufacturer specifications.
Step 8: Post-Installation Testing and Ongoing Maintenance
After testing electrical draw, safety controls, and airflow velocities, the installation crew walks you through proper thermostat operation and basic routine upkeep.
Homeowner Checklist for New Equipment
- Review how to program temperatures, humidity thresholds, and fan settings on your new thermostat.
- Locate filter access doors and verify the exact dimensions required for periodic replacement.
- Register your new system equipment online to lock in extended manufacturer parts warranties.
- Keep the perimeter around the outdoor condenser unit clear of vegetation, debris, and yard waste by at least 24 inches to maintain unimpeded airflow.
Planning a residential replacement requires working with qualified, licensed, and insured heating and cooling contractors who execute thorough load calculations and precise commissioning procedures. When you are ready to upgrade your residential cooling and heating system, scheduling a professional consultation for your HVAC install ensures reliable indoor comfort, lower utility bills, and long-term equipment performance for years to come.
Frequently Asked Questions
How long does a typical home HVAC install take?
A standard residential replacement generally takes between 4 to 8 hours to complete in a single day. Complex installations requiring extensive ductwork modifications, gas line installation, or multi-zone ductless setups may take 2 to 3 days.
Should I replace my indoor air handler and outdoor condenser at the same time?
Yes. Heating and cooling systems are engineered as matched sets. Pairings ensure the indoor evaporator coil and outdoor compressor operate at matching pressures and efficiencies. Replacing only one half of a system often voids manufacturer warranties, reduces energy efficiency, and accelerates component wear.
How often should air filters be changed after a new installation?
Standard 1-inch pleated filters should generally be checked monthly and replaced every 30 to 60 days. High-efficiency 4-inch or 5-inch media filters last between 6 to 12 months depending on household factors like pets, indoor air quality demands, and overall runtime.