Ultimate Guide to Professional HVAC Installation Services
Investing in a new heating, ventilation, and air conditioning (HVAC) system is one of the most significant decisions you will make for your home or commercial property. Your HVAC system is the heart of your indoor comfort, responsible for keeping you cool during scorching summer afternoons, warm during freezing winter nights, and ensuring the air you breathe is clean and healthy.
However, purchasing a high-end, energy-efficient system is only half the battle. The true performance, longevity, and efficiency of your system depend entirely on how it is installed. Poor installation can reduce system efficiency by up to 30%, leading to inflated utility bills, frequent breakdowns, and a shortened equipment lifespan.
This comprehensive guide explores everything you need to know about professional HVAC installation, from selecting the right system to understanding the step-by-step installation process and maximizing your long-term return on investment.
The Importance of Professional HVAC Installation
Many property owners underestimate the complexity of an HVAC system. It is not a simple "plug-and-play" appliance like a refrigerator or a microwave. It is a sophisticated network of electrical wiring, refrigerant lines, ductwork, and sensitive electronic controls that must work in perfect harmony.
Here is why cutting corners with DIY methods or uncertified technicians can be a costly mistake:
1. Perfect System Sizing (Load Calculation)
An HVAC system should never be chosen based on guesswork or a simple square-footage rule of thumb. True professionals perform a comprehensive Manual J Load Calculation. This assessment takes into account:
- The total square footage and layout of the property.
- The number of windows, their orientation, and their insulation value.
- Local climate patterns.
- The insulation levels in your walls, attic, and floors.
- The number of occupants and heat-generating appliances.
If a system is too small, it will run continuously, struggling to hit your target temperature, causing excessive wear and tear. If it is too large, it will "short-cycle"—turning on and off rapidly. Short-cycling prevents the system from properly dehumidifying the air, leading to a clammy indoor environment and premature compressor failure.
2. Maximizing Energy Efficiency
When you buy a system with a high SEER2 (Seasonal Energy Efficiency Ratio) or AFUE (Annual Fuel Utilization Efficiency) rating, you expect lower energy bills. However, those ratings are only achievable under perfect, laboratory-tested installation conditions. Improper refrigerant charging, restricted airflow, or poorly sealed ducts can cause a brand-new, high-efficiency system to perform worse than the old unit it replaced.
3. Protecting Your Warranty
Most leading HVAC manufacturers require proof of professional installation by a licensed technician to honor their equipment warranties. If a component fails due to an installation error, or if you cannot prove a certified professional put the system in, you could be left footing a massive bill for parts and labor.
Key Components of a Standard HVAC System
Before diving into the installation process, it helps to understand what components are actually being integrated into your property. A standard split-system HVAC setup generally includes:
- The Indoor Unit: This is typically a furnace (gas or electric) combined with an evaporator coil, or an air handler. It handles the distribution of air and houses the heating elements or cooling coils.
- The Outdoor Unit: This is your air conditioner condenser or heat pump. It contains the compressor, condenser coils, and a large fan designed to release or absorb heat from the outside environment.
- The Ductwork: A network of metal or flexible tubes running through your walls, ceilings, or crawlspaces to deliver conditioned air to every room and return stale air back to the system.
- The Thermostat: The brain of the system, which senses indoor temperatures and signals the HVAC units to turn on or off.
What to Expect During the HVAC Installation Process
A professional HVAC replacement or installation is a structured, meticulous process. Knowing what to expect can help you prepare your property and minimize disruption to your daily routine.
Step 1: Property Assessment and Prep Work
On installation day, the technicians will arrive and lay down protective drop cloths or plastic runners to shield your floors and furniture from dirt and debris. They will perform a final inspection of the existing setup and ensure all safety switches (like gas valves and electrical breakers) are safely shut off.
Step 2: Removing the Old Equipment
The crew will carefully disconnect and remove the old indoor and outdoor units. If your old system uses older refrigerants like R-22, technicians must legally use specialized recovery equipment to safely capture the gas without venting it into the atmosphere, complying with strict environmental regulations.
Step 3: Inspecting and Modifying Ductwork
Your new system cannot perform efficiently if your old ducts are leaking, collapsed, or clogged. Technicians will inspect the existing ductwork for leaks, gaps, and structural integrity. They will seal minor leaks with mastic or specialized foil tape, and if necessary, modify the plenums (the main air distribution boxes) to match the airflow requirements of your new unit.
Step 4: Installing the New Infrastructure
The outdoor condenser requires a perfectly level, solid foundation—usually a heavy-duty composite or concrete pad—to prevent vibration and ensure proper oil distribution inside the compressor. Concurrently, the indoor unit is securely positioned in your basement, attic, or dedicated utility closet.
Step 5: Connecting the Lines
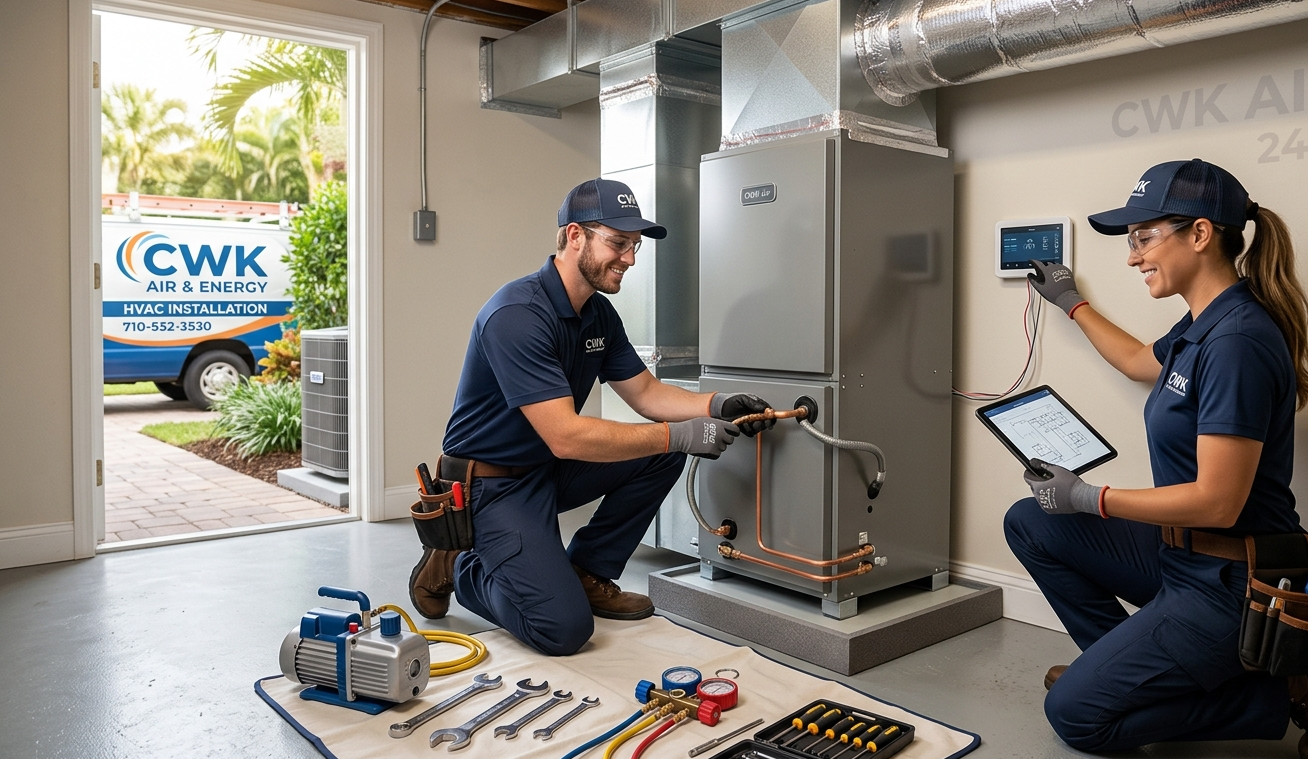
With both units in place, the team will run the copper refrigerant lines between the indoor and outdoor components. These lines must be brazed (welded) together with extreme precision to prevent future leaks. Electrical wiring, high-voltage power lines, low-voltage thermostat wires, and condensate drain lines are also carefully routed and connected.
Step 6: Evacuation and System Charge
Once the refrigerant lines are sealed, technicians use a vacuum pump to remove all air and moisture from the lines. Moisture inside a refrigerant loop can create harmful acids that destroy the compressor. After achieving a deep vacuum, the system is charged with the exact weight of refrigerant specified by the manufacturer.
Step 7: Testing and Commissioning
The system is powered on for the first time, and technicians perform vital safety and performance checks. They measure static pressure, verify airflow across the registers, test the thermostat controls, and ensure the heating and cooling cycles operate flawlessly.
How to Maintain Your Investment Post-Installation
Once your new HVAC system is successfully up and running, your primary goal is to protect that investment. Consistent, proactive maintenance is the secret to extending the lifespan of your unit and keeping your utility bills low.
- Change Your Filters Regularly: This is the easiest yet most critical maintenance task. Check your air filters every 30 to 90 days. Clogged filters restrict airflow, forcing your system to work harder, which spikes your energy consumption and strains vital components.
- Keep the Outdoor Unit Clear: Periodically check your outdoor condenser. Remove fallen leaves, twigs, weeds, and debris from around the unit. Maintain at least a two-foot clearance around the perimeter to ensure unrestricted airflow.
- Schedule Annual Tune-Ups: Just like a car needs regular oil changes, your HVAC system needs professional maintenance. Schedule a cooling tune-up in the spring and a heating tune-up in the autumn. A professional technician will clean the coils, check electrical connections, lubricate moving parts, and catch minor issues before they turn into costly breakdowns.
Choosing the Right Partner for Your Home
Investing in home comfort requires a team you can trust implicitly. You deserve a partner that emphasizes transparency, meticulous craftsmanship, and exceptional customer care. From the initial load calculation to the final system test, every step must be handled with precision. When you are ready to upgrade your home comfort, rely on certified experts who understand the nuances of seamless HVAC installation to ensure your system operates safely and at peak efficiency for years to come.