8 Essential Steps to a Successful HVAC Installation: Ultimate Guide
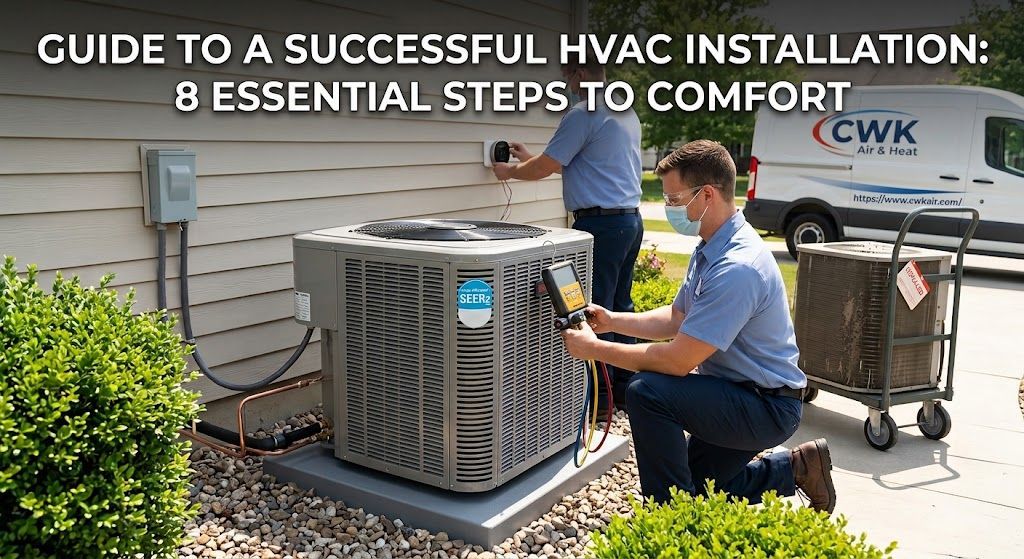
Planning a new cooling and heating system replacement or setup is one of the most significant investments you will ever make in your home's long-term efficiency and indoor air quality. Whether your current unit is struggling to keep up with intense summer heat waves, spiking your monthly electric bills, or simply reaching the end of its typical operating lifespan, understanding how a modern system is chosen and configured empowers you to make smart, cost-effective decisions. Proper planning ensures you select an energy-efficient system tailored specifically to your home’s layout, square footage, and local climatic conditions.
This comprehensive, step-by-step guide breaks down the complete process into simple, actionable phases. From initial load calculations and efficiency selection to modern smart thermostat integration and long-term maintenance, you will learn exactly what to expect from a professional installation project.
Step 1: Recognize when Your System Needs Replacement
Before embarking on a full replacement project, it is crucial to determine whether your current system requires minor repairs or if complete equipment replacement is the most cost-effective path forward. Air conditioners and heat pumps generally have an average operating lifespan of 10 to 15 years, depending on usage intensity, regional humidity, and adherence to routine maintenance schedules.
Key indicators that your property is due for a new unit include:
- Frequent and Costly Repairs: If you are continually repairing worn-out components, such as fan motors, electrical contactors, or compressors, those ongoing expenses can quickly rival the cost of buying a brand-new unit.
- Rising Utility Bills: Older systems gradually lose operating efficiency over time due to wear on internal components, degraded heat exchange coils, and duct air leakage, driving up your energy bills.
- Inconsistent Temperatures: When individual rooms or zones remain uncomfortably warm or drafty despite continuous operation, your existing unit may be losing capacity or struggling with airflow restrictions.
- Outdated Refrigerant: Older residential systems using phased-out cooling agents like R-22 Freon face extremely expensive recharge costs during repairs, making a transition to modern, environmentally safe refrigerants like R-410A or R-454B significantly more practical.
Step 2: Perform Accurate Load Calculations (Manual J)
A major error made during any home heating or cooling upgrade is assuming you should simply buy a replacement unit of the exact same size or tonnage as your old one. Homes undergo structural changes over time—such as updated window glazing, added attic insulation, home additions, or roof upgrades—which alter heat gain and heat loss dynamics.
Qualified contractors perform formal heat load calculations, traditionally guided by the Air Conditioning Contractors of America (ACCA) Manual J standards. Selecting the wrong capacity leads to severe operational problems:
The Risks of Oversized Equipment
An oversized unit turns on, cools down the living space almost instantly, and shuts off rapidly—a phenomenon known as short-cycling. Short-cycling prevents the equipment from running long enough to remove ambient humidity, leaving your indoor environment feeling sticky and damp. Furthermore, continuous rapid cycling increases component stress, leading to frequent mechanical failures and premature system breakdown.
The Risks of Undersized Equipment
An undersized unit lacks the necessary cooling capacity to manage extreme peak summer heat. It will run continuously without reaching your desired thermostat setpoint, consuming excessive electricity while causing unnecessary strain on internal components.
A thorough load assessment evaluates multiple factors:
- Total square footage and ceiling height across all living areas.
- Building envelope orientation relative to natural sunlight exposure.
- Quality and depth of attic, exterior wall, and floor insulation.
- Total quantity, framing type, and energy efficiency ratings of windows and exterior doors.
- Regional microclimates, seasonal outdoor ambient temperature extremes, and average indoor heat loads from occupants and home appliances.
Step 3: Choose the Ideal Equipment Type and Efficiency Ratings
Once your accurate tonnage and capacity requirements are calculated, the next phase involves picking the specific equipment type and energy efficiency tiers that align with your family's indoor comfort goals and financial plan.
Equipment Types
- Central Air Conditioners: Paired with an indoor gas furnace or air handler equipped with electric heating elements, central split systems provide high-capacity cooling for homes with pre-existing ductwork networks.
- Heat Pumps: Extremely versatile and highly efficient, heat pumps deliver both powerful cooling and reverse-cycle heating. They excel in mild-to-warm climates by extracting heat energy from outdoor ambient air and transferring it indoors during cooler months.
- Ductless Mini-Split Systems: Ideal for home additions, converted garages, or homes without room for distribution ducts, ductless mini-split systems offer zoned cooling and heating with minimal structural modifications.
Understanding Key Efficiency Metrics
When reviewing potential equipment specifications, pay close attention to established industry efficiency ratings:
- SEER2 (Seasonal Energy Efficiency Ratio 2): Measures seasonal cooling efficiency under modern, rigorous testing conditions. High SEER2 numbers signify greater cooling power produced per unit of electrical energy consumed. Upgrading from an older 10 SEER unit to a modern 16 SEER2 unit can drastically lower cooling power usage.
- EER2 (Energy Efficiency Ratio 2): Evaluates system energy performance under peak high-temperature operational demands, typically measured at an outdoor temperature of 95°F.
- HSPF2 (Heating Seasonal Performance Factor 2): Measures the seasonal heating efficiency of air-source heat pump equipment.
Investing in variable-speed or two-stage compressors, rather than single-stage models, allows your equipment to run at lower, quieter speeds during mild days. This feature significantly lowers monthly utility expenses while delivering superior humidity control.
Step 4: Inspect, Modify, or Upgrade Ductwork
Even the highest-rated, premium HVAC unit will perform poorly if connected to damaged, leaking, or improperly sized air ducts. Ductwork functions as the pulmonary system of your home, drawing in ambient indoor air, filtering it, and re-circulating conditioned air throughout every room.
During the site evaluation phase, a technician should complete a comprehensive inspection of the supply and return air ducting:
- Checking for Air Leaks: Unsealed duct joints, cracks, or disconnected flex ducts allow cold, conditioned air to escape into unconditioned attics or crawlspaces, while pulling unfiltered dust, humidity, and insulation particles back into your living space.
- Verifying Static Pressure and Airflow: Ductwork that is undersized restricts system airflow, creating high static pressure. This forces the blower motor to work much harder, accelerating wear and reducing efficiency.
- Adding Insulation: In hot attics or crawlspaces, uninsulated or poorly wrapped sheet metal ducts collect exterior condensation (often called "sweating"), which can lead to moisture damage, mold growth, and rust.
Prior to setting up new equipment, technicians must seal all duct connections using durable mastic sealant or specialized foil tape, balancing distribution dampers to guarantee consistent airflow across all living zones.
Step 5: The Professional Installation Process Explained
Knowing what happens on installation day helps homeowners prepare their living space and set reasonable expectations for project timelines. A standard residential installation typically takes anywhere from 4 to 8 hours to complete.
[Phase 1: Site Prep & Removal] ➔ [Phase 2: Unit Placement & Leveling] ➔ [Phase 3: Connections & Piping] ➔ [Phase 4: System Evacuation] ➔ [Phase 5: Electrical & Controls]
Phase 1: Site Preparation and Old Equipment Removal
Technicians begin by protecting your home's flooring and work area. The existing system’s refrigerant is safely recovered into certified containment cylinders in accordance with environmental regulations. Once drained, the old outdoor condenser, indoor air handler, and evaporator coils are disconnected, unbolted, and carefully removed from the premises.
Phase 2: Positioning the Indoor and Outdoor Units
The new outdoor condenser unit is set on a solid, level composite equipment pad elevated above ground level to prevent water collection around the base. Synthetic pad dampening inserts are placed beneath the unit to absorb mechanical vibrations. Indoors, the new air handler or furnace is securely mounted, leveled, and aligned with the main plenum ducts.
Phase 3: Refrigerant Line Set and Drain Line Fitting
New, properly sized copper refrigeration lines are routed between the indoor coil and the outdoor condenser. Technicians braze line connections using an inert nitrogen sweep to prevent internal oxidation and scale buildup inside the copper tubing. Concurrently, new PVC condensate drain lines—equipped with inline safety overflow switches—are installed to safely channel away condensed moisture.
Phase 4: Vacuum Evacuation and Refrigerant Charging
Before charging the unit, technicians connect a vacuum pump to evacuate all air, moisture, and non-condensable gases from the copper line set. The system must maintain a deep vacuum (typically below 500 microns) to verify that the refrigeration circuit is free of leaks and completely dry. Once verified, factory-precharged refrigerant is released or trimmed to precise levels based on total line-set length.
Phase 5: Electrical and Control Wiring
Licensed installers hook up high-voltage power lines through a weatherproof outdoor disconnect box, inspect circuit breakers for appropriate amperage, and connect low-voltage control wiring for thermostats and indoor air quality accessories.
Step 6: Integrate Modern Smart Thermostats and Controls
Upgrading your indoor temperature controls is essential to getting the absolute most out of your new equipment setup. Modern smart thermostats do far more than turn your air conditioner on and off; they actively monitor operational efficiency and adapt to your daily routines.
Key smart thermostat benefits include:
- Remote Access: Adjust indoor temperatures, view humidity levels, and change schedules from anywhere using your smartphone, tablet, or smart home assistant.
- Geofencing Technology: Automatically adjusts temperature setpoints when you leave home and restores your preferred settings as you return, reducing wasted energy without compromising indoor comfort.
- Adaptive Learning Schedules: Tracks your family's daily routine, creating custom heating and cooling schedules based on real-world usage patterns.
- Maintenance Alerts and Diagnostics: Sends automated notifications when it is time to replace air filters or when system sensor anomalies occur, preventing sudden breakdowns.
Integrating a smart thermostat ensures precise temperature staging, maximizing system dehumidification while reducing annual utility costs.
Step 7: System Testing, Commissioning, and Quality Assurance
A successful project finishes with a comprehensive testing and commissioning check. Never let an installation team depart without verifying that your new equipment operates safely and efficiently across all heating and cooling cycles.
A thorough post-installation commissioning checklist includes:
- Checking Electrical Draw: Measuring startup voltage and running amperage on the compressor, fan motors, and electric heat strips to confirm all values align with manufacturer specifications.
- Verifying Temperature Split: Measuring the temperature difference between returning indoor air and supply air blowing from air vents. A standard cooling split typically ranges between 16°F and 20°F under normal operating conditions.
- Testing Safety Controls: Testing condensate float switches, emergency drain pans, pressure cutouts, and heating limit switches to verify immediate safety shutoffs work if a drain clogs or airflow is blocked.
- Airflow Balancing: Verifying that supply registers and return grilles deliver balanced airflow across every living space without creating whistling noises or high static pressure.
- Customer Orientation: Walking you through smart thermostat operations, explaining air filter locations, and showing you where the main electrical disconnects and shutoff switches are located.
Step 8: Protecting Your Investment with Ongoing Maintenance
Completing your new installation is a major step toward long-term home comfort, but ongoing care is necessary to preserve efficiency and safeguard equipment longevity. Proper upkeep preserves your investment, prevents unexpected component failures, and maintains valuable manufacturer warranties.
Essential Upkeep Best Practices
- Replace Air Filters Regularly: Check air filters monthly and replace them every 30 to 90 days depending on filter thickness, pet ownership, and indoor dust levels. Clean filters ensure steady airflow and protect internal evaporator coils from dirty dust buildup.
- Keep Outdoor Units Clear: Maintain a clear two-foot clearance zone around your outdoor condenser unit. Trim back overgrown foliage, weeds, and grass clippings, and clear away storm debris to allow unhindered heat transfer.
- Keep Drain Lines Clean: Flush your primary condensate drain line periodically with white vinegar or warm water to clear away algae and sediment before clogs trigger automatic drain switch shutoffs.
- Schedule Twice-Yearly Maintenance: Partner with certified professionals for bi-annual tune-ups—one in the spring for cooling systems and one in the fall for heating equipment. Professional tune-ups include cleaning heat-exchange coils, checking electrical connections, testing refrigerant charges, and identifying minor wear before it causes major repairs.
If you are ready to replace an old unit or want a custom system design tailored to your home, working with experienced, licensed local professionals ensures every detail is handled correctly from day one. For long-lasting efficiency and dependable year-round comfort, schedule your consultation for expert HVAC installation with trusted industry specialists.
Final Thoughts for Homeowners
Upgrading your home’s air conditioning and heating system is far more than simply replacing a metal box on an outdoor concrete pad. It is a complete, multi-step engineering process that combines accurate load calculations, ductwork evaluations, proper equipment sizing, precision brazing, deep vacuum testing, and modern smart controls.
By following the eight steps outlined in this guide—from early equipment evaluations to post-installation maintenance routines—you ensure your system delivers maximum energy efficiency, lower monthly electric bills, and superior indoor comfort for years to come. Investing time upfront to understand system requirements, efficiency metrics, and installation best practices will give you complete peace of mind through every season.