Complete AC Installation Guide: How to Upgrade Home Cooling
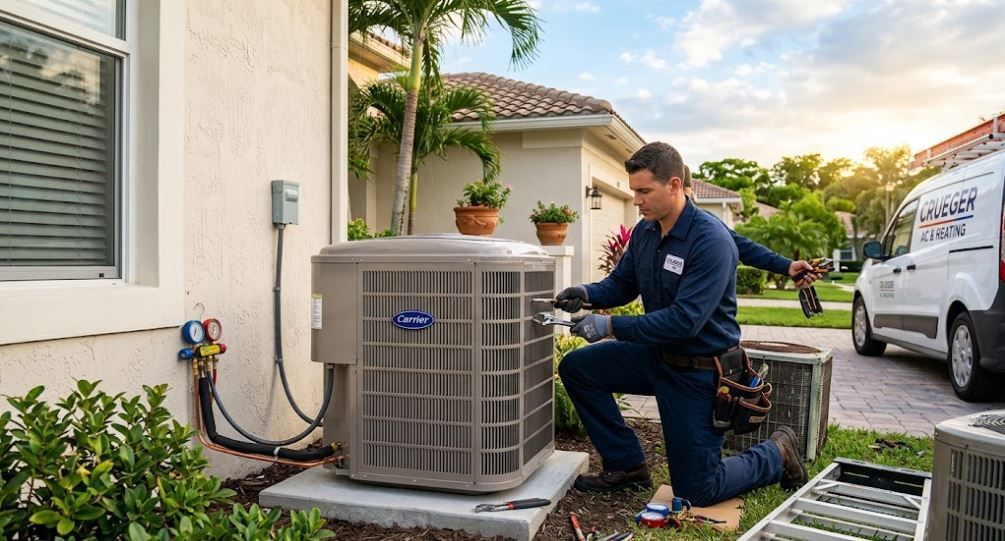
Upgrading your home cooling system is one of the most impactful investments you can make for property value, energy conservation, and daily indoor comfort. When summer heat arrives, having a reliable air conditioner isn't just a luxury—it is essential for a safe and healthy living environment. However, replacing or installing a cooling unit is a significant technical undertaking. Proper AC installation requires exact sizing, precise refrigerant management, complex electrical wiring, and strict adherence to local building codes.
This comprehensive guide walks you through every stage of the home cooling upgrade process, from evaluating your old system to selecting the ideal unit and completing a professional setup.
Stage 1: Recognizing When You Need a New Cooling System
Before jumping into the details of replacing your equipment, it is important to confirm whether a total replacement is necessary or if repairs would suffice. Most standard residential air conditioners are engineered to last between 10 and 15 years. Beyond this age threshold, critical components like the compressor, motor, and evaporator coils begin to experience mechanical fatigue, leading to diminished performance and higher operational costs.
Key Signs It Is Time for a Replacement
- Rising Energy Bills: If your utility costs spike without a corresponding increase in usage or utility rates, your cooling system has likely lost its operational efficiency.
- Frequent Repairs: Following the "50% rule" is standard industry practice: if the cost of repairing your existing unit multiplied by its age in years exceeds the cost of a new system, replacement is the smarter financial choice.
- Inconsistent Temperatures: Drafty rooms, hot spots, or persistent humidity control issues indicate that your current system can no longer manage the cooling load of your layout.
- Outdated Refrigerant: Older systems relying on obsolete refrigerants like R-22 are increasingly expensive to service due to environmental phase-outs and limited supply.
Stage 2: Sizing and Selecting the Right System
A common mistake homeowners make during an upgrade is assuming they should simply buy the exact same unit capacity as their old one. Over time, home improvements—such as upgraded insulation, energy-efficient windows, or room additions—alter your home's total heating and cooling loads.
Selecting an improperly sized unit leads to short-cycling (turning on and off too quickly), excessive humidity buildup, shortened equipment lifespan, and wasted electricity.
The Manual J Load Calculation
To determine the ideal capacity for a property, a qualified HVAC technician performs a detailed Manual J Load Calculation. This standard calculation accounts for multiple structural factors:
- Total square footage and ceiling height.
- Building orientation relative to natural sunlight exposure.
- Quality and depth of wall and attic insulation.
- Total number, size, and thermal rating of windows and doors.
- Regional climate trends and seasonal humidity levels.
Cooling equipment capacity is measured in Tons (where 1 Ton equals 12,000 BTUs per hour). Performing an accurate load calculation ensures your new system delivers steady temperatures without consuming unnecessary energy.
Understanding Efficiency Ratings (SEER2)
When selecting a unit, evaluate its efficiency ratings. Modern systems use the updated SEER2 (Seasonal Energy Efficiency Ratio 2) metric, which reflects real-world duct pressure and operating conditions. Higher SEER2 ratings mean greater energy efficiency, significantly reducing monthly operational expenses over the lifespan of the equipment.
Stage 3: Preparing Your Home for Technical Work
Smooth equipment replacement requires thorough site preparation before technical work begins.
Evaluating Existing Ductwork and Electrical Infrastructure
A high-efficiency cooling system cannot perform properly if paired with damaged or undersized air ducts. A thorough inspection of your ductwork should assess static pressure, check for air leaks, and identify any deteriorating duct sections. Sealing or upgrading ductwork prevents conditioned air from leaking into unconditioned spaces like attics or crawlspaces.
Simultaneously, the home’s electrical setup must be checked. New central cooling units require specific circuit breaker capacities, disconnect switches, and heavy-duty copper wiring. Upgrading these components upfront protects your home from electrical overloads and ensures compliance with national safety standards.
Stage 4: Step-by-Step Overview of the Physical Process
Knowing what happens during physical setup helps homeowners plan their time and set clear expectations for the day of work. A full system replacement generally takes between 4 to 8 hours depending on the accessibility of the site and the complexity of the installation.
[System Sizing & Load Calculation]
│
▼
[Old Equipment Removal & Prep]
│
▼
[Indoor & Outdoor Unit Placement]
│
▼
[Refrigerant Line & Wiring Set]
│
▼
[Vacuum Evacuation & System Test]
Step 1: Recovering Refrigerant and Removing Old Equipment
Technicians begin by recovering any remaining refrigerant from the old system using EPA-approved recovery equipment to avoid venting gases into the atmosphere. Once cleared, the old outdoor condenser and indoor evaporator coils are disconnected, unbolted, and safely removed from the premises.
Step 2: Positioning the Outdoor Pad and Condenser
The outdoor unit requires a level, sturdy concrete or composite pad to minimize vibration and operational noise. Proper clearance around the condenser is essential—typically 12 to 24 inches of open space on all sides—to guarantee unimpeded airflow across the condensing coils.
Step 3: Installing the Indoor Coil and Air Handler
Inside the home, the indoor unit (air handler or furnace casing) is fitted with a new evaporator coil. Proper alignment ensures airtight connections with supply and return plenum ducts, preventing efficiency losses and air leaks.
Step 4: Connecting Lines, Wiring, and Drain Piping
Technicians run new copper refrigerant line sets between the indoor and outdoor units, soldering connections with silver-alloy brazing rods. Condensate drain lines are routed to drain water out of the home, often paired with safety float switches that automatically shut down the system if a drain line clogs, preventing interior water damage.
Step 5: Pulling a Vacuum and Charging the System
Before adding refrigerant, a high-vacuum pump evacuates all moisture and non-condensable air from the copper line set. The system must hold a deep vacuum (typically below 500 microns) to confirm there are no micro-leaks. Once verified, the precise refrigerant charge is released or added according to manufacturer specifications.
Stage 5: Final Testing and Quality Checks
Once all physical, electrical, and mechanical connections are established, the system undergoes rigorous startup testing.
Key Startup Verification Steps
- Airflow Measurement: Testing static pressure across the air handler to confirm balanced airflow throughout the home.
- Temperature Split Test: Measuring the difference between return air and supply air temperatures (typically aim for a 16°F to 20°F drop).
- Electrical Draw Checks: Measuring voltage and amperage on motors and compressors to verify they run within rated guidelines.
- Thermostat Calibration: Setting up and testing modern smart or programmable thermostats to verify seamless communication with the new system.
Choosing the Right Partner for Long-Term Performance
While selecting high-grade equipment from reputable manufacturers is essential, the quality of technical execution during setup determines up to 80% of a system's true operating efficiency and overall longevity. Improperly charged lines, unsealed ductwork connections, or incorrect wire gauge choices can reduce system performance by up to 30% from day one.
To protect your investment, rely on licensed, insured, and experienced HVAC professionals who prioritize load calculations, safety protocols, and long-term customer care. When you are ready to enhance your home's year-round indoor comfort, schedule a professional consultation with the expert team at CWK AC Installation services to receive custom recommendations, transparent pricing, and dependable workmanship.
By investing in high-efficiency equipment and insisting on meticulous technical installation, you ensure a cool, low-humidity indoor environment and lower energy bills for years to come.